 Editing Inventory Counts Editing Inventory Counts
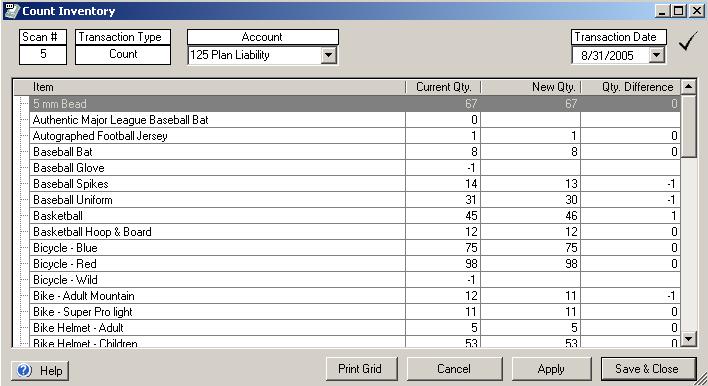
In the transaction editor screen you can view Inventory Counts that were created with Pocket Inventory and makes changes as are necessary.
This section covers the following topics:
Previewing the Back-End Inventory Adjustment
The inventory count header contains the following information:
Scan No - This is a read only field containing the Pocket Inventory scan number.
Transaction Type - This is a read only field containing the current transaction type.
Account - This is an editable field containing the Account that will be associated with the Inventory Adjustment to be created in the back-end.
Count Location - This is an editable field containing the location where the Inventory Count took place. *
Adjustment Date - This is an editable field containing the adjustment date.
Error Info
- The error info can be accessed by moving the mouse over the icon in
the upper right corner of the transaction editor screen. If the icon looks
like  there are errors on the transaction that were generated
when Pocket Inventory Desktop attempted to sync the transaction. Move
the mouse over the error icon to see what the error was. If the icon looks
like
there are errors on the transaction that were generated
when Pocket Inventory Desktop attempted to sync the transaction. Move
the mouse over the error icon to see what the error was. If the icon looks
like  then there are no errors currently on the transaction.
The transaction editor screen contains the list of items on the transaction. Quantities can be changed for an item by clicking into the item's quantity field on the list. The Inventory Count's Item List contains every Inventory Part in the current inventory. Item's cannot be deleted from the Inventory Count's item list, but Un-Check the 'Counted' column at the end of the list to essentially remove the item from the count.
Lots for a particular item can be viewed by expanding the item's row. Click the + sign next to the item's row to expand it. If an item cannot have lots no + sign will be visible.
The same rules apply to editing lot/serials numbers with the exception of lots being changed by manually typing the new lot number into the lot field. There is no drop down from which to select lot numbers. Keep in mind that when lot quantities are changed, the item's quantity will be changed to reflect the total quantity of the lots it contains.
Lots can also be added to an item's lot list by clicking in to the item's lot insertion row. Once a lot number is entered you can then enter a quantity. Keep in mind that when lots are added to an item, the item's quantity will be changed to reflect the total quantity of the lot's it contains.
To delete a lot from the transactions item list, click the delete icon
 for that lot's row.
Click Print Grid to print out the transaction's item list.
Click Apply to save the changes made to the transaction but leave the editor open. Click Save & Close to save the changes and close the transaction editor. Click Cancel to close the editor without saving changes.
To view what the back-end's Inventory Quantity Adjustment that will be created when the current Inventory Count syncs, click the Preview Adjustment button. Essentially the adjustment that will be created will take the difference between the Quantity Per Book and the Quantity Counted and create the appropriate increase/decrease in inventory. Items that are not checked as 'Counted' will not be factored into the adjustment.
Important - The preview is based on the currently SAVED data. Save the current changes you have made to the Inventory Count to view the adjustment with the changes you have made applied to it.
*Applicable to All Orders users only.